Removing nail polish at home doesn’t always require store-bought removers filled with harsh chemicals. You can make your own natural, gentle, and effective nail polish remover using simple ingredients from your kitchen or local store. Learning how to make nail polish remover at home is easier than you think! This guide shows you how to make nail polish remover at home easy using simple ingredients from your kitchen.
In this guide, I’ll share tested and 100% working DIY nail polish remover recipes that are safe for your nails and skin. Plus, I’ll answer all your burning questions in the FAQ section.
Why You Need to Make Homemade Nail Polish Remover?
Store-bought nail polish removers often contain acetone, which dries out nails and skin. Some people also experience irritation or allergies.
Making your own remover gives you control over the ingredients, saves money, and reduces chemical exposure. Plus, it’s eco-friendly!
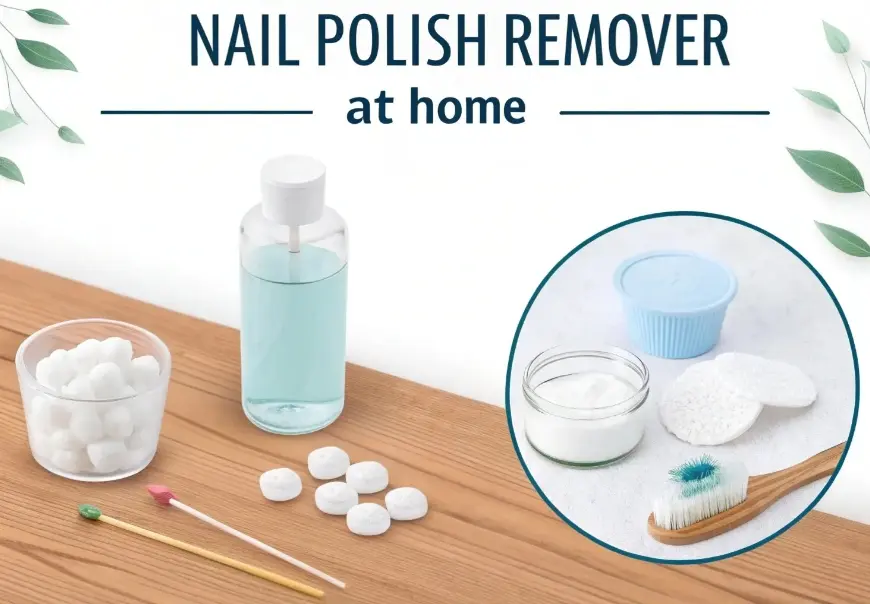
What You Need to Make Nail Polish Remover at Home
You only need a few basic ingredients:
- Rubbing Alcohol (Isopropyl Alcohol) or Vodka – Breaks down polish.
- Lemon Juice or Vinegar – Helps remove stubborn polish.
- Essential Oils (Optional) – Adds a pleasant smell and moisturizes nails.
- Aloe Vera Gel or Coconut Oil (Optional) – Prevents dryness.
5 Best DIY Nail Polish Remover Recipes:
Lets see 5 best Nail Polish Remover Recipes bellow. You can make these easily at home.

1. Basic Alcohol-Based Nail Polish Remover (Strong & Fast)
Best for: Regular nail polish, glitter polish, and quick removal
If you need a fast-acting nail polish remover that works like store-bought ones but without harsh acetone, this DIY recipe is perfect. It uses simple ingredients that break down polish quickly while being gentler on your nails. This is the simplest way for how to make nail polish remover at home when you need quick results.
Ingredients You’ll Need:
- ½ cup rubbing alcohol (isopropyl alcohol) or vodka – The main polish-dissolving agent.
- 1 tbsp lemon juice or white vinegar – Helps lift stubborn polish and brightens nails.
- 5 drops of essential oil (optional) – Adds a nice scent and extra nail benefits (try lavender, tea tree, or orange oil).
Step-by-Step Instructions:
- Mix the Ingredients
- Pour the rubbing alcohol (or vodka) into a small, clean bottle (an old nail polish remover bottle works great).
- Add the lemon juice or vinegar.
- Drop in your favorite essential oil if you want a pleasant fragrance.
- Shake Well Before Use
- Close the bottle tightly and shake for 10 seconds to blend everything.
- Always shake before each use since ingredients may separate.
- Apply & Remove Polish
- Soak a cotton ball or pad in the mixture.
- Press it onto your nail for 5-10 seconds (longer for glitter polish).
- Gently wipe off the polish in one direction (back-and-forth rubbing can weaken nails).
Why This Works:
- Rubbing Alcohol/Vodka – Breaks down the polish quickly, similar to acetone but less drying.
- Lemon Juice/Vinegar – The mild acidity helps dissolve polish faster and removes stains.
- Essential Oils – Prevent the strong alcohol smell and add moisture.
Extra Tips for Best Results:
✅ For Glitter Polish – Soak longer (15-20 seconds) or wrap nails in foil for 1-2 minutes.
✅ For Stubborn Polish – Rub gently in circular motions if needed.
✅ Moisturize After – Apply cuticle oil or hand cream since alcohol can be drying.
✅ Storage – Keep in a dark, cool place to maintain effectiveness (lasts 1-2 months).
Is This Better Than Store-Bought Remover?
✔ Less Harsh – No acetone means less dryness and peeling.
✔ Customizable – Adjust strength by adding more/less alcohol.
✔ Cheap & Easy – Uses items you likely already have at home.
Try this recipe next time you run out of remover—it works like a charm! 💅✨
2. Vinegar & Lemon Nail Polish Remover (Gentle & Natural)
Best for: Weak, brittle, or sensitive nails – perfect if acetone irritates your skin!
If your nails feel dry and damaged after using regular polish remover, this all-natural recipe will clean your nails without harsh chemicals. It works slower than acetone but keeps your nails stronger and healthier. If you want to know how to make nail polish remover at home easy without harsh chemicals, this gentle recipe is perfect.
What You Need:
- ¼ cup white vinegar – Gently breaks down polish
- ¼ cup lemon juice – Helps lift color and brightens nails
- 1 tbsp olive oil (or coconut oil) – Prevents dryness and moisturizes
How to Make It (Super Easy!):
- Mix Everything Together
- Grab a small bowl.
- Pour in the vinegar and lemon juice.
- Add the olive oil and stir well.
- Soak Your Nails
- Dip your fingers into the mixture (or soak a cotton pad and press it on nails).
- Wait 2-3 minutes—this gives the vinegar and lemon time to soften the polish.
- Wipe Off the Polish
- Use a cotton pad or soft cloth to gently wipe the polish away.
- If some polish stays, soak for another minute and try again.
- Massage in the Leftover Oil
- Don’t rinse your hands right away!
- Rub the leftover oil into your nails and cuticles to keep them moisturized.
Why This Works Better Than Acetone:
✔ Vinegar – Weakens the polish so it wipes off easily (but won’t damage nails).
✔ Lemon Juice – Helps remove stains and makes nails look brighter.
✔ Olive Oil – Protects nails from drying out (unlike regular removers).
Tips for Best Results:
- For Dark or Glitter Polish – Soak for 5 minutes instead of 2-3.
- Stubborn Polish? – Add 1 tsp of baking soda for extra power.
- No Lemon Juice? Use orange juice instead—it also works!
- Storage – Keep in a sealed jar for up to 1 week (fresh lemon juice can spoil).
Who Should Use This?
- People with peeling or thin nails
- Anyone who hates the smell of acetone
- Those who prefer chemical-free beauty
Give it a try—your nails will thank you! 🌿💅
3. Acetone-Free Nail Polish Remover with Aloe Vera (Ultra-Moisturizing)
Best for: Dry, cracked, or damaged nails – gives deep hydration while removing polish!
Tired of nail polish removers that leave your nails feeling like sandpaper? This aloe vera and coconut oil remover cleans off polish while repairing your nails at the same time. No more acetone damage—just soft, healthy nails!
What Makes This Remover Special?
✅ Rubbing alcohol – Removes polish fast (but less harsh than acetone)
✅ Aloe vera gel – Soothes and hydrates nails & cuticles
✅ Coconut oil – Locks in moisture to prevent peeling
Ingredients You Need:
- ½ cup rubbing alcohol (70% isopropyl alcohol) – The polish remover base
- 2 tbsp pure aloe vera gel – For hydration (use fresh or store-bought)
- 1 tsp coconut oil (or olive oil) – Extra nail protection
How to Make It (Takes 2 Minutes!):
- Mix Everything in a Bowl
- Pour the rubbing alcohol into a small container.
- Add the aloe vera gel and coconut oil.
- Stir well until smooth (if coconut oil is solid, warm it slightly first).
- Apply to Nails
- Dip a cotton ball into the mixture and press it onto your nail.
- Hold for 10-15 seconds to let it dissolve the polish.
- Wipe Off the Polish
- Gently swipe from cuticle to tip in one direction (no harsh rubbing!).
- For stubborn polish, press the cotton ball on for another 10 seconds.
- Massage in the Leftover Moisture
- Don’t wash your hands yet!
- Rub any leftover aloe and oil into your nails—it acts like a free nail treatment!
Why This Works Better Than Store-Bought Removers:
✔ No Acetone – Won’t dry out or weaken your nails
✔ Aloe Vera – Heals cracks and prevents peeling
✔ Coconut Oil – Makes nails stronger over time
Pro Tips for Best Results:
- For Glitter Polish – Soak for 30 seconds before wiping.
- Too Thick? Add 1 more tbsp of alcohol if the mix feels sticky.
- Storage – Keep in a closed bottle for up to 1 month (shake before use).
- Extra Hydration? Add 2 drops of vitamin E oil for super-soft nails!
Who Should Use This Remover?
- People with peeling, flaky nails
- Anyone who hates the dry feeling after polish removal
- Those who want healthier nails over time (not just clean polish!)
Try this once—you’ll never go back to drying acetone removers! 🌴💅
4. Hydrogen Peroxide & Baking Soda Polish Remover (Powerful for Stubborn Polish!)
Best for: Dark colors, gel-like polish, and super stubborn glitter that won’t budge!
Got a deep burgundy, black, or long-wear polish that just won’t quit? This baking soda and peroxide paste works like magic on tough polish—without the harshness of acetone!
Why This Combo Works So Well:
🔥 Baking soda – Gently scrubs away polish (but won’t scratch nails)
💥 Hydrogen peroxide – Lightens stains and helps break down color
💧 Water – Makes the perfect paste consistency
What You’ll Need:
- 2 tbsp hydrogen peroxide (3% strength) – The kind from your medicine cabinet
- 1 tbsp baking soda – Regular kitchen baking soda works great
- 1 tsp water – To help mix it smoothly
Step-by-Step Directions:
- Make the Polish-Removing Paste
- In a small bowl, mix the baking soda and hydrogen peroxide.
- Add water slowly until it forms a thick, spreadable paste (like toothpaste).
- Apply to Your Nails
- Use a cotton swab or old toothbrush to spread the paste over each nail.
- Make sure to cover all the polish—especially near the cuticles.
- Let It Sit (But Not Too Long!)
- Wait 1 minute—no more! (Peroxide can dry nails if left too long).
- For EXTRA stubborn polish, wait 2 minutes max.
- Wipe or Scrub Off
- Use a damp washcloth to gently wipe away the paste and polish.
- For glitter, use a soft nail brush in circular motions.
- Rinse & Moisturize Immediately
- Wash hands with lukewarm water to remove all residue.
- Apply coconut oil or hand cream—this mix can be drying!
Why This Beats Regular Nail Polish Remover:
✔ No Acetone – But still removes dark polish fast
✔ Whitens Stains – Peroxide brightens yellowed nails
✔ Cheap & Easy – Uses stuff you already have at home
Pro Tips for Best Results:
⚠️ Don’t Use on Fake Nails – Can weaken glue on tips/acrylics
💡 For Extra Power – Add 1 tsp lemon juice to the paste
🧴 Storage – Make fresh each time (don’t save the paste)
🧤 Protect Skin – Rub petroleum jelly around nails first if you have cuts
Who Should Use This?
- Anyone who hates scrubbing at dark polish forever
- People with stained nails from red/purple polish
- Those who want a quick fix without buying special removers
Warning: Your nails will be SO clean, you might just repaint them right away! 💅✨
5. Essential Oil Infused Nail Polish Remover (Spa-Like Experience!)
Best for: Turning polish removal into a relaxing, aromatherapy treat – bye-bye chemical smells!
Who says removing nail polish has to be harsh and stinky? This luxurious DIY remover makes the process feel like a mini spa day. The essential oils don’t just mask odors—they actually benefit your nails while making everything smell heavenly.
Why You’ll Love This Remover:
🌸 Smells amazing – No more harsh chemical fumes
💅 Nourishes nails – Vitamin E and essential oils strengthen nails
🌿 Customizable scents – Pick oils that relax or energize you
Gather These Ingredients:
- ½ cup vodka or rubbing alcohol (vodka is gentler on skin)
- 10 drops essential oil (try: lavender for relaxation, peppermint for energy, or orange for a fresh scent)
- 1 tsp vitamin E oil (or 2-3 punctured vitamin E capsules) – For nail repair
How to Make Your Luxury Remover:
- Choose Your Scent Combo
- Stress relief? 5 drops lavender + 5 drops bergamot
- Morning boost? 7 drops peppermint + 3 drops lemon
- Summer vibes? 10 drops sweet orange
- Mix It Up
- Pour alcohol/vodka into a dark glass bottle (light breaks down oils)
- Add essential oils and vitamin E oil
- Cap tightly and shake for 30 seconds
- Make It Extra Fancy (Optional)
- Add 1 tsp glycerin for extra moisture
- Toss in a few dried lavender buds for visual appeal
How to Use It Like a Pro:
- Shake well before each use – oils separate over time
- Soak a cotton pad – Press firmly on nail for 10 seconds
- Wipe gently – Glide from cuticle to tip in one motion
- Enjoy the aroma – Breathe deep while you work!
Bonus Benefits You Didn’t Expect:
✔ Tea tree oil versions fight nail fungus
✔ Lemon oil brightens yellow nails
✔ Peppermint oil stimulates nail growth
✔ Lavender oil calms cuticle irritation
Smart Tips to Remember:
🌡️ Use vodka if you have sensitive skin – Less drying than rubbing alcohol
🧴 Double duty – Keep a bottle in your bathroom and one in your purse
⏳ Lasts 3 months – The dark bottle preserves the oils
💧 Patch test first – Some oils may irritate very sensitive skin
Perfect For:
- People who hate chemical smells
- Anyone who wants to turn chores into self-care
- Gift idea for nail art friends (pretty bottle + custom scent = amazing present!)
Pro Tip: Use this while soaking your feet for the ultimate at-home pampering session! 🛁✨
Tips for Best Results
- Shake well before each use.
- Soak nails for 10 seconds if polish is thick.
- Moisturize after removing polish to keep nails healthy.
- Store in a cool, dark place to preserve ingredients.
Do you want to know how to make Butter Slime?
FAQs – Most Searched Questions
1. Can I use hand sanitizer as nail polish remover?
Yes! Hand sanitizer contains alcohol, which can remove polish. But it may dry out nails, so moisturize after.
2. Does vinegar remove nail polish?
Yes, but it works slower than alcohol. Mix it with lemon juice for better results.
3. How can I remove nail polish without cotton balls?
Use a soft cloth, paper towel, or even a sponge.
4. Is homemade remover safe for kids?
Yes, if you use gentle ingredients like vinegar and lemon. Avoid strong alcohol for young kids.
5. Why does my DIY remover not work as fast as acetone?
Acetone is stronger, but it damages nails. Homemade removers take a few extra seconds but are safer.
6. Can I use coconut oil alone to remove polish?
No, coconut oil alone won’t remove polish. But it helps moisturize nails after removal.
7. How long does homemade nail polish remover last?
About 1-2 months if stored in a sealed bottle.
Is how to make nail polish remover at home easy really effective?
Yes! These recipes work as well as store-bought versions.
My Opinion
Making nail polish remover at home is easy, cheap, and safe. Whether you want a strong remover or a gentle one, these recipes work 100%. Now that you know exactly how to make nail polish remover at home, you’ll never need to buy harsh chemical removers again!
Try them out and say goodbye to harsh chemicals! Let me know which recipe you liked best in the comments.
Did you find this helpful? Share it with your friends! 😊